12.12.2018

Latest 5 Photo Editing Apps in 2019


It’s been a long time since stand-alone pictures or an actual #NoFilter has actually been enough. And it is pretty obvious. Memorable moments don’t look at pimples or bad hair days to be created. They jump out of nowhere and frankly the memories that are created surprisingly are the best ones.

Also Read: 8 Best Face Beauty Camera Apps For Android

But then what do we do about bad hair days or that stubborn pimple right on your forehead? That’s where new age applications and fancy filters and stickers come to play.And by this, I don’t mean that slurpy voice dog filter on snapchat. One look at the Play store or the Apple App Store will introduce you to a million new photo editing applications that will make your pimple disappear or will reduce your waistline a tiny bit or widen your eyes and basically transform your weird looking picture back to a beautiful memory with your flawless self in it.


But the numerous applications can get quite confusing as well. So we here got a list for you according to the user and other reviews, regarding the 5 best photo editing applications in use during these times.
Most Downloaded and Best Photo Editing Apps in 2018
Adobe Photoshop mix

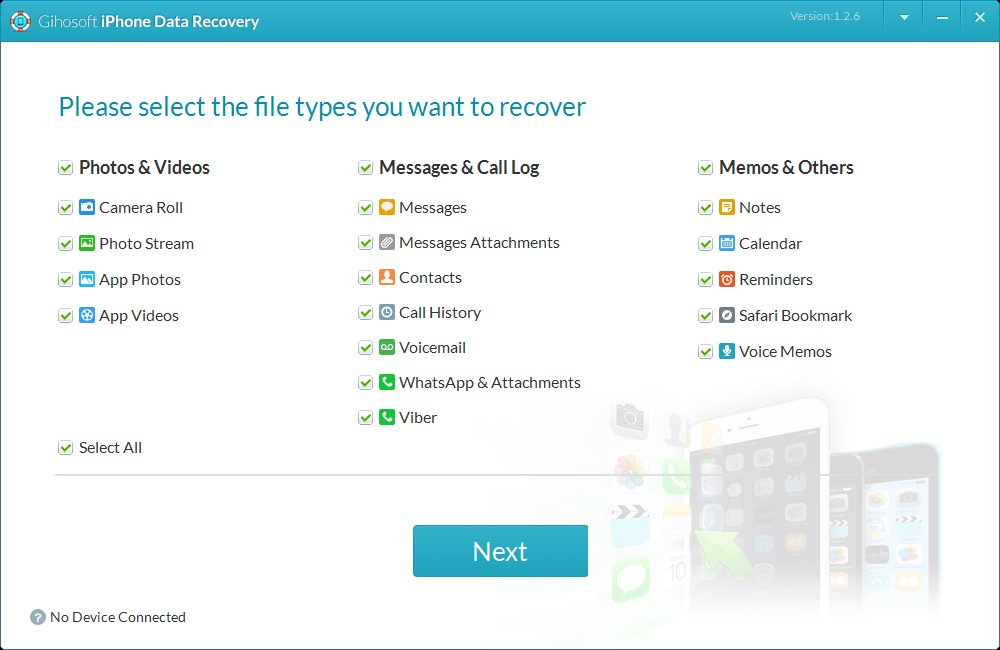
This application deserves the first place just because of its name. Can you imagine anything related to adobe ever disappointing us? Especially when it specifically has to do with editing? Not at all.Gihosoft RePicvid Free Photo Recovery Software provides a free photo recovery software for windows to help users recover the deleted or lost photo for free.


This is an application which, as its name suggests, is photoshop which is compatible with iOS or Android right on your phone. Its an all in one combination of a photo editing application with much more than just that. I’m sure you are curious about the “more” part of it. Well, let us be the bearers of a surprise for you.


This is an application which lets you superimpose two photos on each other. That’s definitely a unique quality that this big brand brings with its name, but it doesn’t stop at that. It does act like a normal photo editor too with multiple filters, exposure levels contrast etc. We don’t this there is much that this application doesn’t have. Well, it does have a name to stand up to.

Also Read: Top 5 Best Cameras Apps for Android to Take the Perfect Selfie
Airbrush


Quite like the name suggests AirBrush is definitely a tool which will be handy even in your mobile. Advertised as the “Best Photo Editor on App Store” this application doesn’t disappoint. We believe this application is must keep for every selfie addict. Didn’t get the perfect selfie angle? Not your best profile on the show? Just airbrush it to perfection.


Use its various filters to make your face just as perfect as it actually is or maybe even better. Who knows? But some of us have points in the looks department but fall back slightly when it comes to our editing skill. And for people like us, AirBrush has a “Magic Wand” feature where all you have to do is tap and your photo is automatically adjusted to look perfect.


Apart from all its features for widening your smile or slimming your waist or erasing that out of angle double chin, the magic wand does surprise us and gives us an amazing application to use.
Bonfire Photo Editor


Photo editors are definitely helpful. But sometimes you encounter a situation where nothing suits your picture. And you get that feeling that “It’s just not right” Trust us this application won’t give you a chance to say that.

Are you wondering why? Because this application has over a hundred and ten plus filters made just for you. It does end up spoiling you with choices. These filters give desktop application filters also a run for their money. But these filters don’t stick to only black and white or Sephora or antique or whichever the common filters are.


This application takes a step forward and gives you a chance of turning your picture into innovative watercolor paintings as well. Not just that it can even turn you into an sn city character or give you an old renaissance touch along with many other exciting features which you will have to discover yourself. And along with all this did we mention the beauty features such as skin glowing, blemish killer etc? This is definitely a pandora’s box for editing tools.
Photo Lab


For many of us clicking pictures isn’t just a hobby or a way of capturing a moment. It’s science. And for such scientists, we present to you the “Photo Lab”. Now this name isn’t as popular as many of the applications mentioned here. But we do have a reason to mention it all the same.

Useful tips: If you have deleted some beloved or edited photos for some reason, but now you regret it, and want to get them back, there is a software for you, that is Gihosoft Free Android Data Recovery, it’s a professional photo recovery artifact, which can help you recover deleted photos from any Android phone quickly.


This application is like the underdog we bet our money on. One of the major reasons for this is the number of filters this application provides. Go on give it a guess. 110? Naa! that’s is so “last app”.


This application touches great heights of six hundred and forty filters. What can ever go wrong when you have so many options at your fingertip? Nothing at all. But it doesn’t end there this application enables you to create montages, give the photos a light edit, and also lets you bring in two effects to create quite a unique range of photos.
Pixlr


No complex software, easy to use interface and over 2 billion effects, filter and overlays. This application is every mobile photo editors dream come true. Surprised by all this? Let me make it easier for you to digest. This application also, similar to Adobe Photoshop, is made by one of the big names in editing.


Pixlr Editor is a creation of Autodesk. So I guess we do expect equal greatness from it and it certainly doesn’t disappoint. It is pretty unnecessary to say that this is a customer’s choice application and has unbelievable reviews on PlayStore as well as App Store.


Now one unique thing about this application is that it uses its filters as “OverLays” so it doesn’t completely change your photograph but put a layer on top of it. Along with this functionality, it even acts as a normal beautifying photo editor and does an amazing job at it.

Also Read: How to Hide Private Pictures on Any Android Phone

Now that we have shortlisted a few applications for you, we believe you would want to try for yourself? Do not hesitate to go ahead and try out and let the world know your beauty without blemishes Very Happy editing to you.


12.10.2018

How to root Xiaomi Mi 8 Lite


The Xiaomi Mi 8 Lite borrows the same design cues from its premium sibling the Xiaomi Mi 8, however, rather than coming with the flagship Qualcomm Snapdragon 845, the Mi 8 Lite packs in the Snapdragon 660 which by its own means is a fairly powerful chipset too.

Xiaomi launched the Mi 8 Lite with Android 8.1 Oreo alongside Xiaomi’s custom skin MIUI 10. If you’ve been a long time Android user, then you probably know the benefits of having a rooted device. There’s so much to tweak and explore after rooting your Android device.

Xiaomi’s MIUI by default allows users to customize their device way more than what other OEM skins offer, however, there are a few applications that only work with devices that have root access. These apps allow you to tweak your device in whatever way you want as well as open a world of possibilities for you on your Android smartphone.

Rooting has several benefits, however, rooting your smartphone would void your Xiaomi Mi 8 Lite warranty as well hence, we’d suggest keeping this in mind before you proceed to root your device. If you’re not a big fan of customizing and exploring the possibilities of Android devices, then there’s no reason to root your device since MIUI 10 offers a ton of features and options to play around with.

Warning!

Do not try anything given on this page if you do not know completely what you are doing. In case any damage occurs, we won’t be held responsible.

Compatibility

The downloads and the guide given here are compatible only with the Xiaomi Mi 8 Lite. Do not try this on any other device as you may end up bricking it.


Xiaomi Mi 8 Lite TWRP Recovery

Grab the TWRP recovery file from below.

To install TWRP, see the root guide below. As installing TWRP is what you do first in order to root the device, we have merged the TWRP and root guides into one guide. Just skip step 14 related to rooting the device in the guide below if you only need to install TWRP recovery. Don’t forget to install the Force Encryption disabler file (step 11 below).
Xiaomi Mi 8 Lite Root

Here’s an easy step-by-step guide to help you install TWRP recovery on your Xiaomi Mi 8 Lite. You can use the TWRP recovery to easily gain root access on the device.


Make sure that you’ve unlocked the bootloader for the Mi 8 Lite before proceeding. Take your time doing this.


Download the required files:


TWRP recovery: recovery-TWRP-3.2.3-1003-XIAOMI8LITE-CN-wzsx150.img


Force encryption disabler – DisableForceEncryption_Treble.zip


Root file (Magisk 17.1): Magisk 17.1.zip


Connect your Mi 8 Lite to PC using the USB cable that came with it.


Transfer all the downloaded file (TWRP, Magisk, and Encryption disabler) to your Mi 8 Lite. Do keep a copy of TWRP file on your PC too. Keep the Mi 8 Lite connected to PC.


Make sure you have enabled USB Debugging on your Mi 8 Lite, as explained in the bootloader unlock post above (step 1). You may need to re-do it after unlocking the bootloader.


Now open a command window inside the folder where you have the TWRP file from above. For this, go that folder, and then type cmd in the address bar of that folder’s window, and then hit the enter key. A command window will open up, and its location will be that folder.


Boot your Mi 8 Lite into bootloader/fastboot mode. For this run this command:


adb reboot bootloader


└ If you get a permission dialogue on your device to “Allow USB debugging”, tap OK.


Install TWRP recovery on your device by running the command below. To run a command, simply type this in the command window and then hit the enter key.


fastboot flash recovery <name of the TWRP file>.img


An example command to flash twrp recovery


Reboot into recovery mode to access TWRP before starting Android. For this, run the command below:


fastboot boot <name of the TWRP file>.img


You will see TWRP recovery now. When asked to ‘Keep System Read only?’, tap on the ‘Keep Read Only’ button to not allow for system modifications.


Install Force Encryption disabler. Tap on Install, then select the Force Encryption disabler file (DisableForceEncryption_Treble.zip) and confirm on the next screen.


Reboot to TWRP recovery again. On the home screen of TWRP, tap on Reboot, and then on Recovery.


When back in TWRP, tap on Wipe, and then on Format data option. Type yes on the next screen to confirm wiping of data. This will delete everything on the device.


Time to root the Mi 8 Lite! [In case you don’t want to root the device, ignore this step.]


Transfer the Magisk file to your Mi 8 Lite.


Install Magisk root package. Go back to the home screen of TWRP and tap on Install, > then select the ZIP file, Magisk-v16.7.zip, and confirm on the next screen.


Restart the device: tap on Reboot > System. Your Mi 8 Lite is rooted now. You can verify root access on your Mi 8 Lite using a root checker app.

That’s all about rooting and installing TWRP recovery on your device.

Related:

7 Best FRP Bypass Tools to Bypass Google Account on Android 2019

Top 8 Free Equalizer and Bass Booster Apps for Android 2019

10 Android Fitness Apps To Help You Shed Off Pounds

Transfer WhatsApp Messages between Android and iPhone

Restore WhatsApp Backup from Google Drive to iPhone/Android

How to Recover Data after Factory Reset on Android


Jihosoft Photo Eraser

Erase unwanted objects and perfect your amazing photos!

Remove objects from photos with Photo Eraser is almost as easy as taking a shot. Now you can use this tool to erase undesirable objects from your pictures, such as tourists, watermarks, logos, texts, blemishes and other unwanted things without real photo-editing skills required at all.


Jihosoft Android Data Recovery

The most powerful and professional data recovery software for Android that can restore deleted or lost contacts, photos, videos, audios, SMS, call logs, WhatsApp chat, Viber messages from any Android devices due to accidental deletion, virus attack, formatting. It supports all popular Android smartphones and tablets like Samsung, HTC, LG, Huawei, Motorola, Nexus, etc. In the meantime, you will be guided step by step if you never used this kind of tool before.

How to use the ECG App on Apple Watch 2019


How to install the latest iOS and watchOS updates

To install the newest software for iPhone and Apple Watch follow these steps:
iOS


Tap the Settings app on your iPhone.


Select General > Software Update.


Follow the onscreen prompts to download and install the newest software.
watchOS


Tap the Watch app on iPhone.


Choose General > Software Update.


Follow the onscreen prompts.

Note: Developers who want to use the ECG app must uninstall Apple developer profiles from both the iPhone and Apple Watch to download the updates. Once you remove the profiles, reboot each device and then follow the directions to download the updates.
Setting Up the ECG App

Before starting the ECG app for the first time, you must set it up through the Health app on iPhone.


Tap the Health app on iPhone.


You should see a pop-up introducing the new feature. Tap Set Up ECG App.


You’ll need to add your birthdate on the next screen. Once you do, tap Continue.


On the next few screens, you’ll learn more about the ECG app. Tap Continue on each screen to move through the process.


Next, you’ll see a message indicating that you can now take an ECG reading on your Apple Watch. Tap Skip if you’d rather not at this time.

At this point in the process, attention moves to the Apple Watch. Once you take your first ECG reading on Apple Watch, come back to the Health app on iPhone to confirm the test.


Using the ECG App on Apple Watch

To take an ECG recording on your Apple Watch:


Push the Digital Crown on your wearable device.


Find and tap the ECG app.


Hold your finger on the Digital Crown for 30 seconds.


After seeing the test results, scroll down and tap Done.

During this time, you’ll see a clock counting down on your Apple Watch face. If you remove your finger from the Digital Crown at any time during this process, you’ll need to begin it again to complete the process.


Once completing the test, you’ll see one of three readings on your watch face:


AFib: an irregular heartbeat


Sinus Rhythm: a normal heartbeat


Inconclusive

To use the ECG again, repeat steps 1 through 4 above.

Sponsor ads:

Gihosoft Free iPhone Data Recovery:https://www.gihosoft.com/iphone-data-recovery-free.html

Gihosoft iPhone Data Recovery Free

Free iPhone Data Recovery Software for Windows/Mac

Recover up to 12+ types of files, including contacts, SMS, photos, WhatsApp, Viber, notes, etc.

Restore lost data from iOS devices directly or from iTunes and iCloud backup

Recover iPhone data lost due to iOS upgrade/jailbreak, accidental deletion, device lost or broken

Support all the latest iPhone, iPad and iPod Touch

Both Free and Pro version.

If you lost data after you updated to a new iPhone, you can always use Gihosoft iPhone Data Recovery to get the data back from the old iPhone or backup.You may also like: iphonerecovery.com

If you use android phones, please choose Gihosoft Android Data Recovery.

With Gihosoft Android Data Recovery, no longer afraid of data loss!

jihosoft Free iPhone Data Recovery


Worth reading:Best youtube downloader online download youtube 1080p

8.14.2018

7 Best Personal Assistant Apps for Android with voice commands 2019

The Craze for Personal Assistant Apps for Android users has increased after the official launch of the Siri and Cortana in past years.

If you have a sweet voice assistant in your Android mobile, it becomes easy for you to just cross things off from your to-do list. It seems to be a reminder, an alarm or a calculator.

Gym workout. Preparing reports. Sending emails. Creating letters. Latest News. Book Movie Tickets. Or just writing a new blog post. It is hard to remember each of the tasks, which should be completed on time. But when you have a virtual assistant in your Android smartphone, things become pretty easy and accessible.

Using a voice assistant app, you can find nearby restaurants or ATMs, keep track of the important stuff, and wish your Girlfriend “Happy Birthday” on time

See Also: Best Android Data Recovery App without Rooting


In this article, you are going to find some of the best personal android assistant apps.

Unfortunately, there is no Siri for Android, but luckily you have a Cortana. Does it make any sense? I don’t believe. All the Assistant apps including Google Now works one as a same.

7 Best Personal Assistant Apps for Android with voice commands


Google Allo.


Cortana.


AIVC (Alice).


Haptik Personal Assistant.


Jarvis (My Personal Assistant).


Indigo Virtual Assistant.


HOUND Voice Search and Assistant.

1. Google Allo


Google Allo is primarily a messaging app which can be used as an Android virtual assistant. You can also include Google into your personal/group conversation by just using @Google in it.

Main Features:


Smart Reply, to automatically suggest nice responses to text and photos.


Describe the images you send, by doodling on them or adding text.


Talk to your Google assistant by including it in the convo.


Easily find nearby places, hotels, restaurants.


Question Answers using Google search.


Setup a reminder, schedule messages and lot more.

Download this App!


2. Cortana


Cortana is another personal assistant which will help you keep track of the important stuff wherever you are, across your devices. It was first introduced in Microsoft Windows 10 Operating System. Now it is also available for Android mobiles.

Main Features:


Link your phone with your Windows PC and manage the call records from it.


Detects traffic areas and hence helps you to go to your office at the right time.


Schedule your important dates, reminders, etc.


Fast answer or info gathering (Voice Assistant).

Download this App!


3. AIVC (Alice)


Alice is another great voice assistant app for Android. With Alice, Android users get a helpful assistant at hand, which understands more than just commands. Alice knows a lot and is constantly learning new things.

Main Features:


Accept voice orders, to start specific apps.


Replies to the commands such as weather, time, scores, etc.


Define your own commands with Alice.


Controls basic mobile functions such as SMS, Calls, etc.


Calculates complex math problems in just a few seconds.


Create a to-do list, reminders, schedules, etc.

Download this App!


4. Haptik Personal Assistant


Haptik is basically made by and for Indian users to hire a personal assistant without paying a single penny. Using Haptik personal assistant app is the easiest way to get things done. Currently, Haptik is a chat based Android app.

Main Features:


Set Reminders for Wake Up Call, To-Do List, etc.


Book flight, train tickets and cabs and hotels.


Recharge and pay bills.


Schedule Pick up and Drop Services.


Order food.

Download this App!


5. Jarvis – My Personal Assistant


Jarvis is an extraordinary and professional Android personal assistant app which also operates on wearable Android devices. This app is unique and also supports voice commands.

Main Features:


Notifications about the weather, news, battery status & power levels.


Various themes to match your parent mobile theme.


Directly call or send text messages to your contacts using simple voice commands.


Set quick wake up alarms, reminders and schedules.


Play music by its name.

Download this App!


6. Indigo Virtual Assistant


Indigo is a free and easy to use a virtual assistant app for Android users. Talking to Indigo feels just like you are talking to a human being. She accepts all the voice commands from starting a particular app to showing the latest news across the globe.

Main Features:


Keep you updated with the news – from sports to technology.


Control your music player using voice commands.


Connect with social media sites like Facebook and Twitter.


Easily get the weather forecasts for any location.


Search with Google, Bing and Yahoo for the answer to any question.


Find the best location for any delightful occasions.

Download this App!


7. HOUND Voice Search & Assistant


Hound is a free voice search and virtual assistant app for Android smartphones. The voice search of Hound is rated 5 stars and enrolled to be the best voice search app for android.

Main Features:


Make phone calls and send text messages using voice commands.


Speak what you’re looking for rather than typing (Voice search).


Get instant weather report for today.


Ask for a destination and travel there seamlessly.

Download this App!


More Useful Apps for Your Android Phone:


Top 10 Best Screen Recording Apps for Android Not to be Missed

Top 10 Ad Blocker Apps for Android – Stop Pop-Ups & Block Ads Easily

Android Music Players: 10 Best Free Audio Players for Android in 2018

Top 10 Best Free Android Photo Editors in 2018

Top 8 Methods to Run Two WhatsApp Accounts on One Phone Easily


Well, these are some of the best personal assistant apps for Android OS. If you liked this post, don’t forget to share it with your friends on Facebook and Twitter. Share your suggestions in the comment box.You may also like:

iPhone backup unlocker:Recover iTunes Backup Password.

iPhone backup extractor :The best iPhone Backup Extractor software to extract photos, text messages, contacts, voice memos, note, WhatsApp, Viber and etc from iPhone/iPad backup

Gihosoft Free iPhone Data Recovery is a professional iPhone Data Recovery software to get back all your lost text message, photo, video, call history, note, contact and more from iPhone/iPad/iPod Touch. It offers a full solution to recover your lost data in different tough situations. Besides recovering data directly from iPhone, iPad and iPod touch, it also allows you to recover data from iCloud and iTunes backup files.

6.16.2018

iCloud Contacts Not Syncing with Outlook/Mac/iPhone? How to Fix it

iCloud Contacts Not Syncing with Outlook/Mac/iPhone? How to Fix it
Part 1. iCloud Contacts Not Syncing on Mac


If your systems are correctly configured but you still can’t get the contacts to sync on your Mac, these two solutions should help you get the contacts on your iPhone to also appear on the Mac.
Keep the Contacts Up to Date on iCloud


Making sure that all the contacts you have on iCloud are up to date is one way to ensure they sync with the Mac. Follow these simple steps to do that;
You may also like:
If you lost videos from iOS Camerall Roll which are nowhere to download again, you can use Gihosoft iPhone Data Recovery to get back deleted videos from iOS device including iPhone, iPad and iPod Touch.Please check jihosoft iphone data recovery

Step 1: Log in to iCloud.com and then click on “Contacts.”


Step 2: Make sure that all the contacts in iCloud are up to date before exporting them to vCard.


Step 3: Now delete all the contacts in your iCloud account. In a few minutes, the contacts will disappear from all your devices.


Step 4: Now Import the contacts you downloaded earlier back into iCloud.com. They will appear on all your devices.
Part 2. iCloud Contacts Not Syncing to iPad


If your iCloud contacts don’t appear on the iPad, the following troubleshooting solutions can help;
Check the Internet Connection


Contacts will fail to sync if the internet connection you are using is not strong enough. So the first thing you should so is check your internet connection. You can try resetting the network on your iPhone by going to Settings > general > Reset > Reset Network Settings.
Disable and Enable iCloud Syncing


If your internet connection is just fine but your contacts are still not syncing, try disabling iCloud syncing and then enabling it again.


Step 1: Go to Settings > Profile > iCloud or Settings > iCloud (for iOS 10.2 and earlier).


Step 2: Turn off “Contacts.”


Step 3: Tap on “Keep on my iPhone.”


Step 4: Reboot the device and then turn “Contacts” in iCloud on again. When asked what you’d like to so with existing local contacts, tap “Merge.”


Set iCloud as Default Account


You may also experience these iCloud syncing problems if iCloud is not your default account for contacts. To check, follow these simple steps;Gihosoft iPhone Data Recovery is a professional iPhone Data Recovery software to get back all your lost text message, photo, video, call history, note, contact and more from iPhone/iPad/iPod Touch. It offers a full solution to recover your lost data in different tough situations. Besides recovering data directly from iPhone, iPad and iPod touch, it also allows you to recover data from iCloud and iTunes backup files.


Step 1: Go to Settings > Contacts.


Step 2: Tap on “Default Account” and if it is not iCloud, select iCloud from the list.
Part 3. iCloud Contacts Not Syncing with Outlook


If your iCloud contacts fail to sync with outlook, the following simple steps can help you fix the problem;


Step 1: Ensure that you are using the latest iCloud control panel. If not, take a moment to install it.


Step 2: Now sign in to your Outlook account and then go to File > Account settings.


Step 3: Click on the Data File Tab and then go to the iCloud Menu. Here, remove and close your email account.


Step 4: Now click on the “Windows” icon and open the control panel. The open iCloud and sign in if you are not already logged in.


Step 5: Click on Setup iCloud contacts, calendars and tasks.


Now open Outlook and check if your iCloud contacts are syncing.


6.10.2018

iOS 12 makes Digital Health Management possible


1. LIMIT USAGE WITH SCREEN TIME


Screen Time is a new iOS 12 feature that tracks screen time usage by apps and app categories.


It is a more powerful alternative to the Moment app that tracks screen time for all apps on your iPhone.


The Digital Health Mangement section also doubles up as the Parental Controls section.


All the actions given below can be performed on your device and on the devices of your family or children.


Here’s how you can check and track screen time usage.


Step 1 Open Settings and go to the Screen Time section.


Step 2 Your device will now display screen time statistics as shown below. Tap anywhere on the stats to access detailed usage charts.


You can use the “Set Up Screen Time for Family” option to limit and control the usage for your children.


Step 3 Scroll down to access the number of pickups, that is, when you unlock your Apple device and the number of notifications you receive hourly.


You can use the “Set Up Screen Time for Family” option to limit and control the usage for your children.
2. RESTRICT APPS WITH APP LIMITS


App Limits section allows you to impose restrictions on apps and app categories.


Once you “limit” an application, its icon will appear dark and an hourglass icon, which indicates that an app is limited, will appear alongside its name.


If you try to open a restricted app or game, iOS will promptly remind you of the “limit” in place with a paywall-esque screen.


Here’s how you can restrict apps on your iPhone and iPad.


Step 1 Go to Settings > Screen Time > App Limits.


Step 2 Tap Add Limit and select the app category that you want to limit.


Step 3 Set the Time limit for which you want to restrict the apps belonging to the aforementioned categories.


Step 4 With the limit in place, here’s what you will get when you try opening an app from the limited categories.


Step 5 (Optional) Restricting an app doesn’t mean you can’t open it for the scheduled time. Tapping Ignore Limit and selecting “Remind me in 15 minutes” or “Ignore Limit for Today” will allow you to bypass the limit.


“Remind me in 15 minutes” option will bug you after 15 minutes have passed since you opened and began using the app whereas “Ignore Limit for Today” will completely nullify the current limit for today.


Alternatively, you can set up app limits from the screen time section by tapping the hourglass icon.
3. ENABLE DOWNTIME


Downtime allows you to schedule time away from your device. It achieves that by imposing “app limits” on each and every app and game installed on your device except for a few stock apps like Phone.


Although downtime disables all apps, you can manually whitelist any app that you would want to use during your scheduled time period.


Step 1 Go to Settings > Screen Time > Downtime.


Step 2 Enable Downtime.


Step 3 Specify the “Start” and “End” time. Remember, Downtime will stay active throughout this time cycle.


Step 4 Go to Always Allow section and add/remove any app or game from the whitelist except for the stock Phone app. I recommend enabling only the Phone and FaceTime apps.


WRAPPING UP


iOS 12 really hits the bullseye with its impeccable digital wellness management.
Sponsor ads:
Gihosoft iPhone Data Recovery Free
Free iPhone Data Recovery Software for Windows/Mac
Recover up to 12+ types of files, including contacts, SMS, photos, WhatsApp, Viber, notes, etc.
Restore lost data from iOS devices directly or from iTunes and iCloud backup
Recover iPhone data lost due to iOS upgrade/jailbreak, accidental deletion, device lost or broken
Support all the latest iPhone, iPad and iPod Touch
Both Free and Pro version.
If you lost data after you updated to a new iPhone, you can always use Gihosoft iPhone Data Recovery to get the data back from the old iPhone or backup.You may also like: iphonerecovery.com
If you use android phones, please choose Gihosoft Android Data Recovery.
With Gihosoft Android Data Recovery, no longer afraid of data loss!

Android P already has this feature but iOS really knocks it out of the park with its user-friendly interface, attention to detail, and customizability.


I have already limited applications belonging to the Games, Social Networking, and Entertainment categories as I spend a lot of time on social networks and YouTube.


Here’s to hoping that some extra time on my hands will definitely allow me to pursue honorable endeavors like talking to other humans.

HOUDINI11 SEMI-JAILBREAK NOW SUPPORTS IOS 11


HOUDINI11 SEMI-JAILBREAK NOW SUPPORTS IOS 11


As you already know, Houdini is a limited version of jailbreak and brings basic theming and customization to the iOS operating system. It is also called a “semi-jailbreak”.


Earlier, it was available only for iOS 10-10.3.2 versions. The latest update brings support for iOS 11 firmware as well.Must read:Gihosoft Free iPhone Data Recovery:https://www.gihosoft.com/iphone-data-recovery-free.html


Houdini11 uses Ian Beer’s async_wake exploit to get root access and apply the necessary customization. Therefore, you can use it only up till iOS 11.1.2 and all other newer versions like iOS 11.2 are incompatible.


Here’s what’s new in the latest update.


Built-in Ad-blocker


Change icon shape


Enable new emoji packs


Customize boot logo


Add your face to Animojis in iPhone X


Quick startup


Additional safety measures


Theme support for iOS 11 (not working yet)


Update (June 6) – Houdini Beta 3 released for iOS 11.2-11.3.1 firmware versions. You must have a paid developer certificate to run the app on your device. Remember, you must turn Siri off beforehand to increase the success rate of the exploit.
WHICH DEVICES IS HOUDINI11 COMPATIBLE WITH?
IPHONE


iPhone 5s


iPhone 6/iPhone 6 plus


iPhone 6s/6s plus


iPhone SE


iPhone 7/7 plus


iPhone 8/8 plus


iPhone X
IPAD


iPad Air


iPad Air 2


iPad Pro


iPad mini 2


iPad mini 3


iPad mini 4
IPOD


iPod touch 6
DOWNLOAD HOUDINI11 IPA


Beta 2r1 (11-11.1.2)


Beta 3 (11.2-11.3.1)
REQUIREMENTS


A compatible iPhone, iPad, and iPod touch


iOS 11-11.1.2 firmware


A computer running Windows, Linus, or macOS
HOW TO INSTALL HOUDINI11 ON IOS 11-11.1.2/11.3.1 FIRMWARE


Step 1 Download the Houdini11 beta 2 IPA file using the download link above.


Step 2 Connect your device to the computer and start Cydia Impactor. Wait for it to recognize your device.


Step 3 Sideload the IPA file by dragging it over to Impactor’s window.


Step 4 Key in your Apple ID details.


Step 5 Wait until it sideloads the IPA onto your Apple device. Once it’s done, the app will appear on your home screen.


Step 6 Go to Settings > General > Profiles & Device Management and verify the Houdini app under your email address.


Step 7 Open the app from your home screen. You can now perform various actions such as respring and clean system and customize your device.


Themes aren’t working right now so make sure you don’t apply them. However, the developer will surely add theming support on iOS 11 in future versions.


You can also install it using package installers such as Tutuapp and Appvalley. I don’t recommend it because they add advertisements in all their applications and you must use jailbreak tools from trusted sources.


Sponsor Ads:


Gihosoft iPhone Data Recovery is a professional iPhone Data Recovery software to get back all your lost text message, photo, video, call history, note, contact and more from iPhone/iPad/iPod Touch. It offers a full solution to recover your lost data in different tough situations. Besides recovering data directly from iPhone, iPad and iPod touch, it also allows you to recover data from iCloud and iTunes backup files. What's more, it supports Smart Recovery modes that can find your iPhone data quickly.https://www.gihosoft.com/iphone-data-recovery-free.html


For more jailbreak community news, follow and like us on Twitter and Facebook.